Column Wrap Installation
General Tools and Materials
-
 Caulk Gun
-
 Color Complimenting Textured Caulk
-
 Loctite® PL® Premium® 3X Construction Adhesive
-
 Tape Measure
-
 Exterior Screws
-
 Jig Saw (Optional)
-
 Circular Saw
-
 Utilty Knife
-
 Screw Gun / Drill Driver & Bits
-
 Painters Tape
-
 Column Cap (optional)
-
 Exterior Grade Sheathing (for medium & wide columns)
-
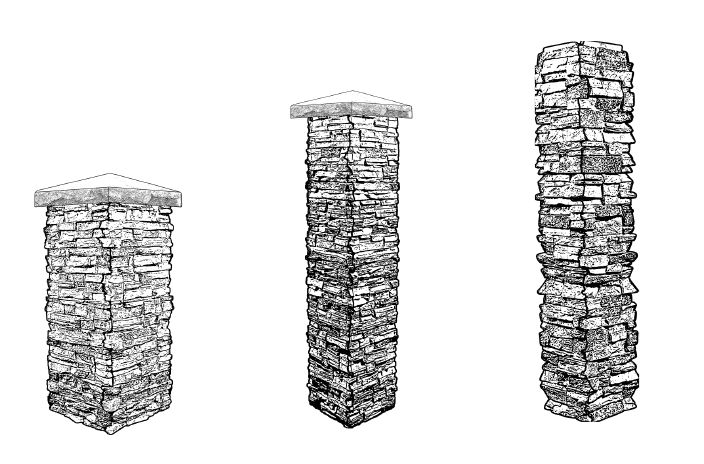
 Columns
-
 2x4 Lumber
-
 Shims (if needed)
-
 Touchup Kit
-
 Tack Cloth
-
 Clean Cloth
-
 Small Paint Brush
-
 Laser / Level
-
 Cotton Swabs
-
 Safety Glasses
24 Hours Before Starting - Ensure post is structurally sound and in good condition. Clear away brush and debris.
Acclimate faux column and installation materials by storing them flat in the installation location (but away from moisture and direct sunlight or other heat sources) for at least 24 hours.
- Be sure to obey all safety rules and recommendations set forth by tool manufacturers.
- Always follow any, and all, local, state, and federal building codes.
- Always comply with clearances set forth by the manufacturer of stoves, fireplaces, furnaces, and any other heat source.
- Wear safety glasses during the entire installation process.
Directions

Step 1
Install Structural Post
Start with a secure 4x4 or 6x6 structural post that matches the height of the column.
Step 2
Stacking Columns (optional)
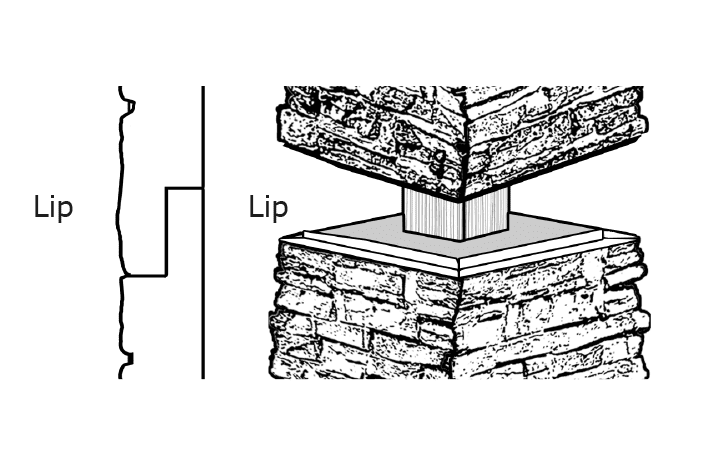
Measure the total height of the installation. If column sections need to be trimmed for height, plan the cuts so that the shiplap joint between the upper and lower column sections is maintained.
Step 3
Frame Out or Shim the Post
Tools:
- Exterior Grade Sheathing
- 2x4 Lumber
- Shims
- Tape Measure
- Circular Saw
- Exterior Screws
- Screw Gun / Drill Driver & Bits
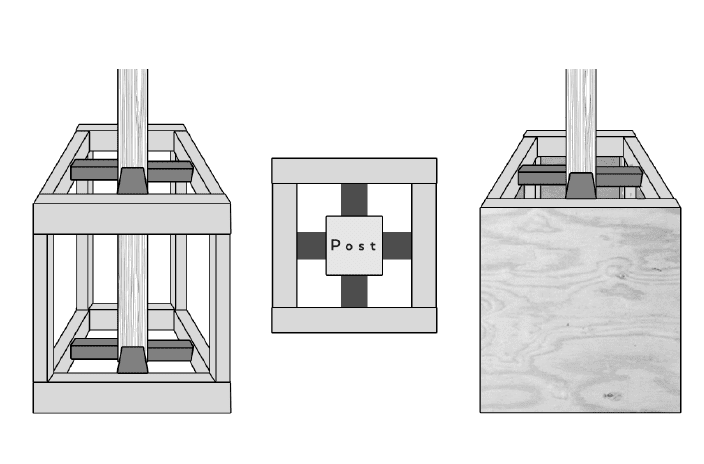
For medium or wide columns construct and sheathe a sub-frame that is the same height and 1/4” smaller than the interior measurements of your column. Note: your structural post may be the same height as the sub-frame.
For narrow columns shim as necessary to fill gaps between the structural post and the inside of the column. If using a column wrap, ensure that the shims are added on a side where the seam will be located.

Step 4
Secure Column Sleeve
For Column Wraps skip to Step 5
Tools:
- Screw Gun / Drill Driver & Bits
- Exterior Screws
- Slide the Column Sleeve Over the Post
- Secure the sleeve with exterior screws. To make screws easier to conceal add them under rocks or in mortar joints. Slightly countersink screws but do not over-tighten.
- Skip to Step 10

Step 5
Dry Fit the Panels
Ensure panels fit the sub-frame and interlock appropriately. Make any necessary adjustments.

Step 6
Prepare Area
Tools:
- Caulk Gun
- Color Complimenting Textured Caulk
- Loctite® PL®Premium® 3X Construction Adhesive
- Tack Cloth
- Wipe the back of the columns and the face of the subframe with a tack cloth to remove debris.
- Turn the column section over on a soft surface. Apply beads of Loctite PL 3X adhesive to the back in vertical lines spaced no more than 3” apart.
- Add a dab of adhesive to the back of any projections.
- Add a small amount of the color coordinating textured caulk to the edges of the fingers where they join with the next section of the column wrap.
Step 7
Adhere Column Wrap
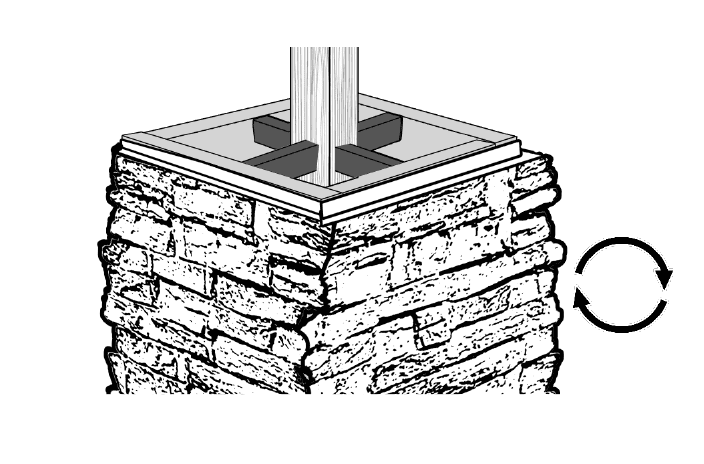
- Apply the column wrap to the structure.
- Use a slight twisting/sliding motion to help insure good contact between the adhesive and the plywood.
- Repeat for additional sections of the column wrap.

Step 8
Screw Wrap to the Sub-Frame
Tools:
- Laser/Level
- Exterior Screws
- Screw Gun/Drill Driver & Bits
Make sure that the column wrap is level and the fingers fit together.
Fasten the sections to the sub-frame by adding about (1) screw per square foot. Take care to add them along the perimeter and the center of the section. Screws should be slightly recessed.
DO NOT OVER-TIGHTEN SCREWS
HINT: Place screws under protruding rocks or in grout lines to make them less noticeable.

Step 9
Clean Excess Caulk
Tools:
- Clean Cloth
Use a clean cloth to remove any caulk that squeezed out from between panels.
Step 10
Install Next Level (optional)
Tools:
- Loctite® PL®Premium® 3X Construction Adhesive
- Caulk Gun
- Color Complimenting Textured Caulk
If installing a second level, add a bead of adhesive to the top lip of the bottom section then follow Step 5 through Step 9 for each level.
Step 11
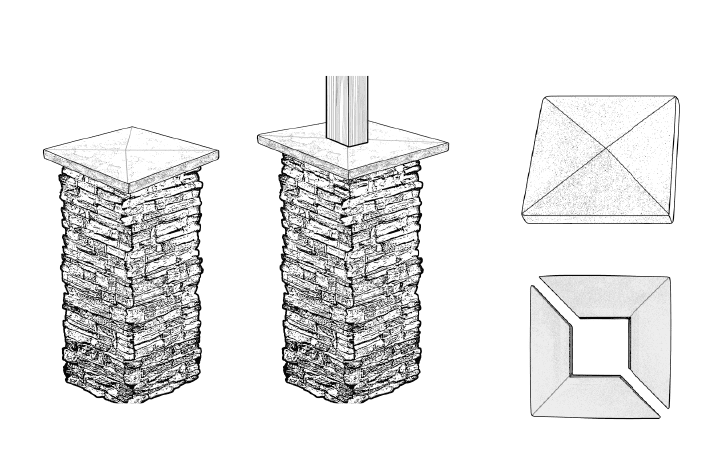
Select Column Cap
If not using a column cap skip to Step 14.
- There are two basic styles of column cap; split and solid.
- Split caps are available to accommodate 4” or 6” square posts.
- Solid caps can be used as the crowning touch of a stand-alone column, or can be altered to accommodate a post.
Step 12
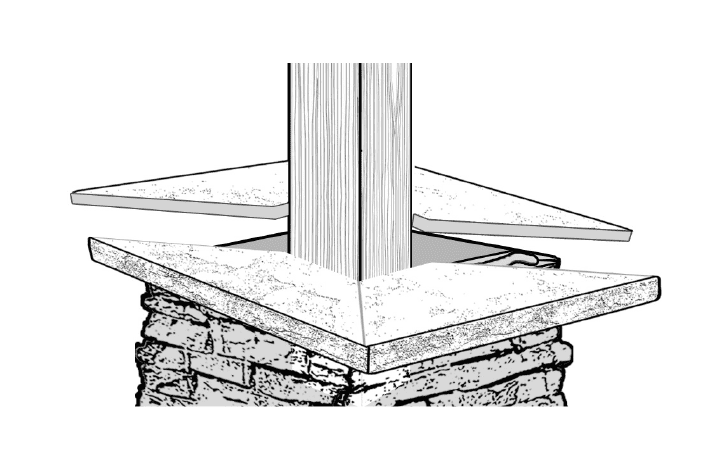
Cut Column Cap (optional)
Tools:
- Screw Gun / Drill Driver & Bits
- Jig Saw
If installing a solid column cap around a post, cut the cap in half along the diagonal. Determine the size of opening needed to accommodate the post. Drill pilot holes in the cap then use the jig saw to create the opening.
Step 13
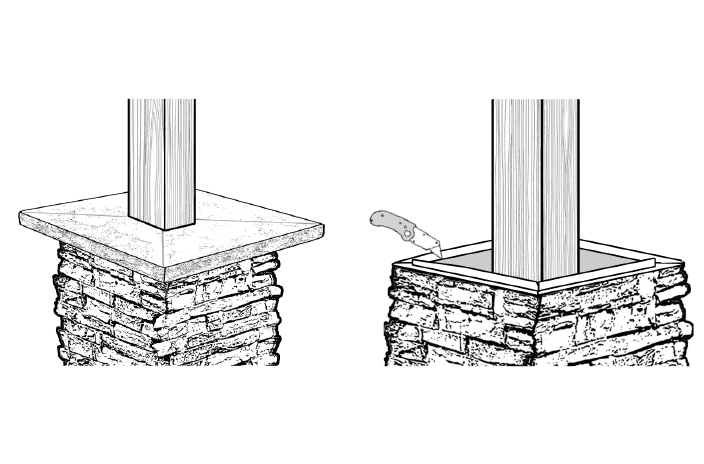
Dry Fit Column Cap
Tools:
- Utilty Knife
Set the cut cap on top of the column and assess the fit. Trim any protrusions on the column that impact the fit.
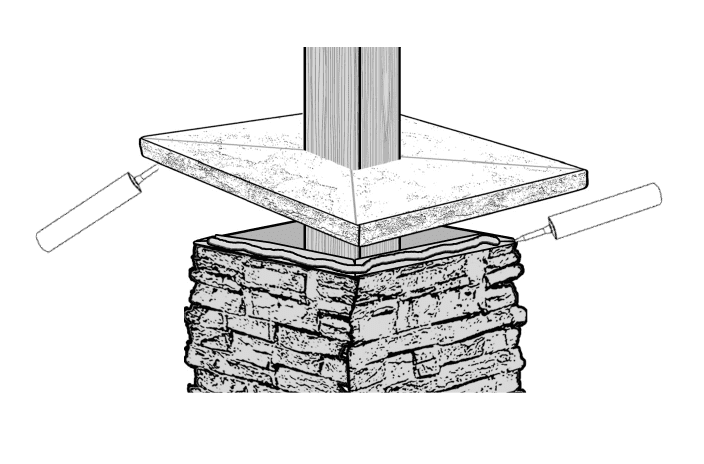
Step 14
Apply Adhesive and Mount Cap
Tools:
- Clean Cloth
- Caulk Gun
- Exterior Screws
- Loctite® PL®Premium® 3X Construction Adhesive
- Screw Gun / Drill Driver & Bits
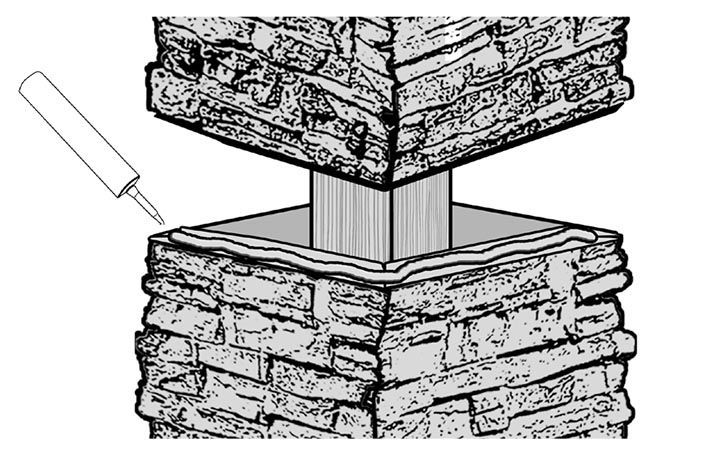
- Apply a bead of adhesive to the top of the column wraps, wood sub-structure and halves of the cap.
- Firmly press the cap to the column the sides of the cap together (if necessary). Secure cap by toe screwing.
- Wipe any excess adhesive with a clean cloth.

Step 15
Touch-up as Needed
Tools:
- Caulk Gun
- Caulk
- Clean Cloth
- Small Paint Brush
- Cotton Swabs
- Touchup Kit
- Caulk - Add caulk to fill in voids, gaps and holds from screw heads. Carefully blend before it dries.
- Base Coat - If your touch-up kit contains a base coat, use a cotton swab to apply a light layer of the base coat and allow it to dry completely (about 30 minutes).
- Paint - Using a paint brush, apply the appropriate paint then dab with a soft cloth to blend and allow to dry completely (about 30 minutes).
- Wash - If your touch-up kit contains a wash, apply the wash using a paint brush and dab with a soft cloth to blend.
Wash Concentrate - If the bottle is labeled “wash concentrate” add tap water to the neck of the bottle, screw on lid, and shake to mix before using.
HINT: If you need to mix colors to achieve the desired shade, we recommend doing so on a piece of scrap material. Paint can be thinned by adding water. Start with lighter colors.